

Chris and I have been really enjoying perfecting our bulk baking and freezing method for home-made sourdough pizza crusts, and I’m so pleased to report that we have finally landed on an awesome method that works really well! There’s nothing more fun than having a freezer full of par-baked crusts ready to be turned into fresh pizza at a moment’s notice. It’s made our Friday evenings in quarantine that much more fun to know that we’ll be whipping up a fresh hot pizza to enjoy while we watch the Bachelor. It’s the simple joys, friends!
We have mastered the art of bulk fermenting our dough so that we can make 6 crusts at a time. We use the recipe from Ken Forkish for sourdough pizza crusts, but this method will probably work well with your favorite pizza crust recipe (probably including yeasted (non-sourdough) versions as well). Through months of experimentation and many fresh pizzas later, we’ve come to learn that the par-baking method results in a far superior result, especially compared to frozen and thawed dough. By par-baking the crusts, you are able to lock in most of the bubbles and rise while the dough has been fully proofed properly, unlike the freeze and thaw method that generally kills any active starter or yeast, and leads to an overly proofed and unevenly-hydrated dough. In our experimentation, frozen and thawed dough tended to result in flat, dense crusts with very little rise, which still tasted okay (it’s pizza, afterall!) but was nowhere near the texture of our fresh crusts. The par-baked method results in a near-perfect crust, and bakes up a perfect pizza in 20 minutes.
I’m not going to post the recipe that we use for the dough because it doesn’t appear to be publicly available online, and I don’t want to take credit for a recipe that is not mine. The recipe that we use is published in the book Flour Water Salt Yeast by Ken Forkish. He also has a whole book about pizza called The Elements of Pizza which looks like a lot of fun, and his website and YouTube page have a lot of fun content about pizza and bread making. Click on all of those links to check out Ken’s recipes for more information and inspiration!
I also found a similar (although yeasted recipe) that’s publicly available for use made by Ken Forkish for the James Beard Foundation. That recipe is linked here if you need a pizza dough starting place!
Find a recipe you like, and make a big batch! When your dough is ready to be baked, follow the method for our par-baking pizza crust listed below! Method and pictures below of our process. Happy Pizza Night, friends!
Method: Par-Baked and Frozen Sourdough Pizza Crusts
Ingredients:
- Pizza crust dough balls, fully proofed and at the stage to be baked
- We usually make 6 at a time, which is manageable and fully stocks the freezer for a few weeks.
Method:
- Preheat the oven to 450F.
- Set up two clean baking sheets with a Silpat or a piece of parchment paper to prevent sticking during baking. Lightly flour the surface of the Silpats or parchment paper, set aside.
- Using floured hands, gently pull and stretch the pizza dough into a thin, round shape, rotating between pulls to keep the crusts stretching out evenly into a round shape. Once the dough has reached your desired size and thin-ness, place the stretched dough onto the floured surface of the prepared baking sheet. Repeat the process with one other dough ball to have two pizza crusts ready for the oven.
- If you don’t want to stretch the dough with your hands, feel free to roll the dough balls out on a floured surface to your desired shape, size, and thin-ness. Transfer to the prepared baking sheets and proceed with the rest of the steps as written!
- Place the baking sheets in the oven and bake at 450F for 15-20 minutes. Remove from the oven when the dough is blond (very lightly golden brown) and bubbles in the dough have just set. After removing the dough from the oven, transfer the par-baked dough onto a wire cooling rack and allow to cool to room temperature (at least 1 hour).
- Repeat the baking and cooling process with the remaining dough balls.
- Once all of the pizza crusts have been baked and cooled, transfer to large, sealable plastic bags (or wrap tightly in plastic wrap) and store in the freezer for future use.
When ready to use the frozen pizza crusts:
- Pre-heat the oven to 425F.
- Remove the frozen pizza crust and place on a baking tray lined with a Silpat or a piece of parchment paper. Allow to thaw slightly on the stove top while the oven preheats.
- Once slightly thawed, add sauce and desired toppings.
- Bake at 425F for 20 minutes, until crust is fully golden brown and toppings are fully cooked through.
- Remove from the oven and allow the pizza to cool slightly before slicing and eating.
- Enjoy!

Step 1: Make your dough! 
Portion when fully proofed, and allow to rest and proof again (depending on your recipe) 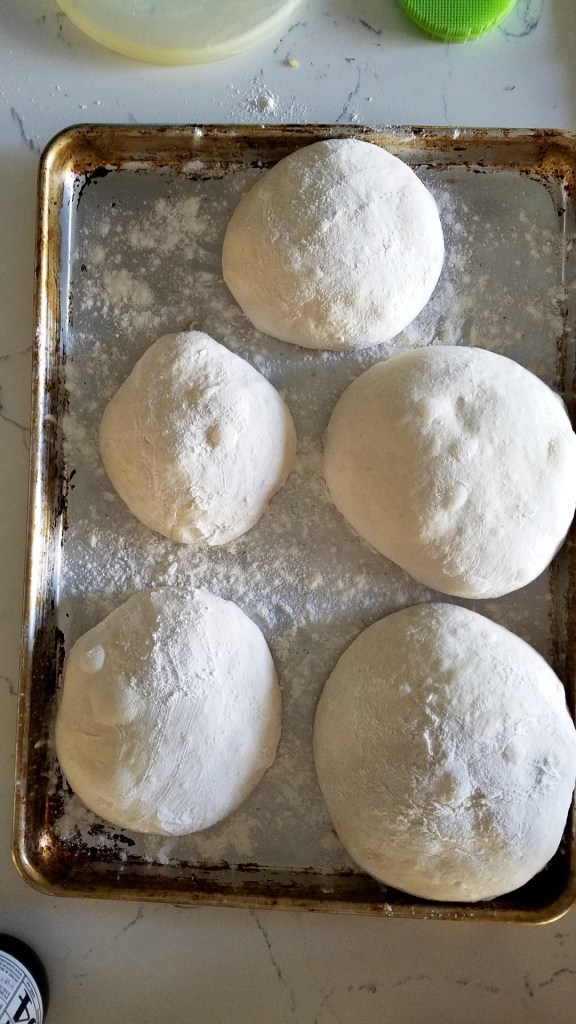
Our finished dough balls, ready to be stretched and baked!

Stretch the dough into a thin, round pizza crust. 
Par-bake at 450F for 20 minutes. 
Remove from the oven when blond like this, cooked enough to hold the bubbles but not yet browning.

Transfer par-baked dough to a wire wrack to cool completely before packing. 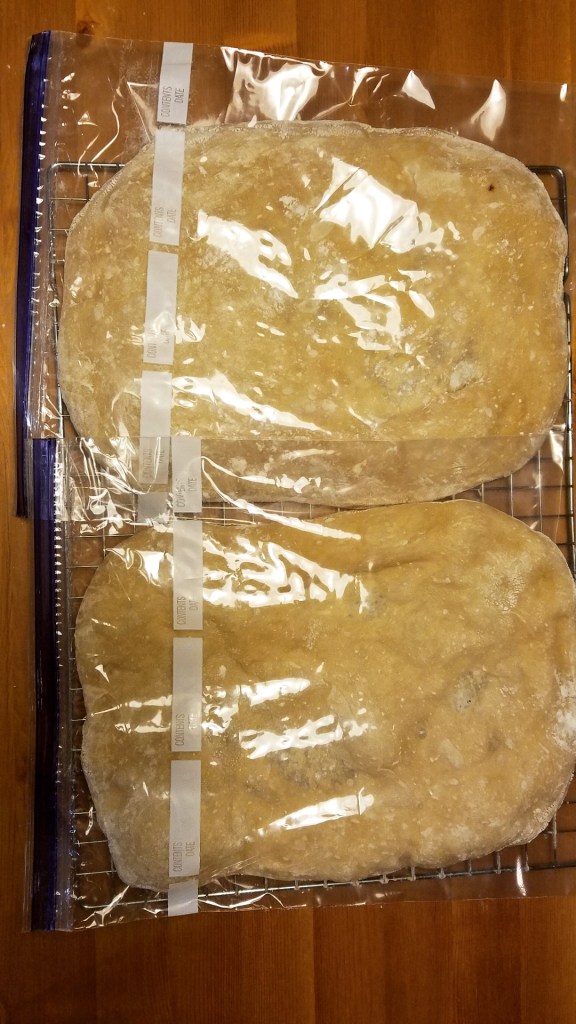
Once cool, place in large, sealable bags and store in the freezer for future use.

Thank you for your method on partaking and freezing your pizza crust! I think it just makes sense to do a batch and freeze for those easy dinners. Will try it this weekend thank you!
LikeLike
That’s awesome, and do glad I could help! Let me know how it goes, and enjoy your pizza 🍕
LikeLike