

Over the weekend, I was gifted with a large case of strawberry seconds from my friends at Pickalittle Farm. Not being a fan of food waste, I brought them home that afternoon with much excitement (who doesn’t love beautiful, fresh strawberries?) and plans to freeze for future use.
The best method for freezing berries (or anything, for that matter), is to make sure it freezes as fast as fast as possible. This can be done in a household freezer, or with some liquid nitrogen if you have access to that (super fun, but we’re going with the freezer method here). The key to fast freezing at home is to cut items up into smaller pieces, and lay those pieces out on a tray in a single layer to maximize exposure to the cold air and minimize the chances of your frozen fruit forming one giant clump in a Ziploc bag. This process is known in the food industry as “IQF”, or “Individually Quick Frozen”. This method is done in very cold industrial freezers for anything from frozen shrimp to frozen peas, but it can also be done in your home freezer.
During the freezing process, ice crystals form and lock up all of the liquid water, making it impossible for bacteria to survive, enzymatic processes that lead to spoilage to proceed, and essentially halting any decomposition. This is why frozen foods can last essentially forever in your freezer, as long as they stay frozen. Ice crystals, however, can negatively impact the fruits and vegetables, as they pierce through cell walls and cause some damage to the overall structure of whatever is being frozen. When items are frozen on an industrial scale or in liquid nitrogen, the environment where the freezing takes place is so cold that the ice crystals that form are very small, and therefore impact the structure of whatever is being frozen less. Larger ice crystals will form in a home freezer because they don’t get super cold, but this can be minimized with proper spacing and sizing of the fruit. The result will be frozen berries that will thaw out to be a little mushy, but are still perfect for sauces, baking, jams, ice cream, and smoothies.
I used the method below in my home freezer to preserve all of my berries, and I am quite pleased with the results so far. I ended up with a completely full two gallon freezer bag of berries, which is incredible. It goes without saying that I have a lot of berries on hand right now, so stay tuned for more strawberry content throughout the week! Pictures down below as well.
How to Freeze Strawberries:
- Be sure berries are washed and completely dry before freezing. Excess water on the berries before freezing will cause very large ice chunks to form around the berries, which isn’t ideal.
- Remove the stem and leaves from the strawberries, and cut berries into quarters (or halves if they are small).
- Place the strawberry quarters into a single layer on a parchment-lined baking sheet. Add up to two more layers (separated by parchment paper) of strawberries on the baking sheet to ensure all of the berries can fit in your freezer.
- Allow to freeze for a full 24 hours to ensure each berry is frozen solid.
- Transfer berries into a re-sealable plastic freezer bag. Store in the freezer and use berries as desired.
- Enjoy!
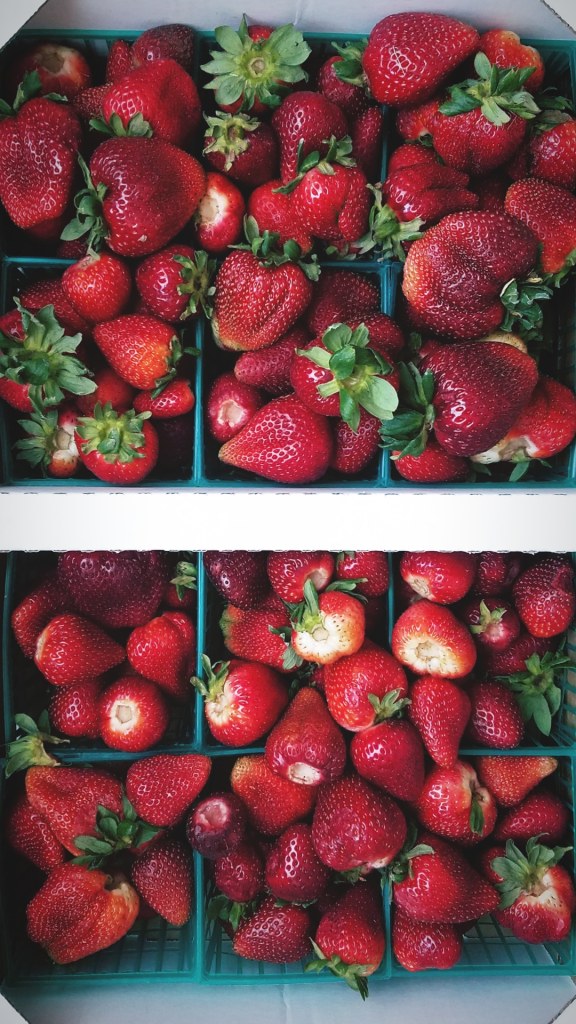
So many strawberries! 
Quartered, spaced out, frozen in layers. 
Bagged for future use!

Comments